Thursday, November 15, 2012

White Truffle Mac and Cheese (aka Fancy Schmancy Mac & Cheese)


Ingredients

½ cup butter

½ cup chopped red onion

½ cup chopped garlic

½ cup all-purpose flour

2 cups whole milk

1½ cup cooked cavatappi pasta

2 Tbsp plus 2 teaspoons chopped fresh rosemary

2 Tbsp plus 2 teaspoons chopped fresh thyme

2 Tbsp plus 2 teaspoons chopped fresh basil

¼ cup infused white truffle oil

1½ cup grated Parmesan

¼ cup Japanese bread crumbs (panko)

to taste salt and freshly ground black pepper

 
Directions

Cook pasta according to package directions.
Preheat the broiler. Add butter to a saucepan over medium-high heat. Saute onions and garlic until they turn slightly brown. Add flour and whisk together for 3 minutes to make a blonde roux. Whisk in milk and bring to a boil, stirring constantly to prevent the roux from burning. Cook for approximately 10 minutes or until the roux has dissolved completely and you can no longer taste the flour. Add pasta and stir until hot. Add fresh herbs, truffle oil, and half of the Parmesan and stir until dissolved. Season, to taste, with salt and pepper. Put all ingredients into an ovenproof dish and sprinkle the remaining cheese and bread crumbs on top evenly. Place under a broiler until top becomes golden brown.
 
Source ~ My Dear Friend Jennie via San Diego Restaurants dot com via Gaslamp Strip Club (Restaurant Side Dish)
 
Patti’s notes: Cavatappi is measured before cooking the pasta.  I personally think the cavatappi makes this recipe great so I wouldn’t substitute with other pasta. YMMV.  I make this recipe as-is and my nephew’s youngest son says it’s the best ever. 
Side note: I have developed an allergic reaction to truffle oil so I don’t eat this anymore because I can’t possibly make it for him without one of the “fancy schmancy” parts. 
 
Health-o-Meter: Why even go there?  Remember, it's a side dish.  It is not recommended to eat the entire pan when nobody is looking!  ;-) 
 
Easy Meter: Not bad.  Lots of herb chopping and babysitting the roux so I would ever-so-slightly elevate it up a half a notch from easy. 

Sorry, not photos.  I'll take photos next time I make it. 

Sunday, November 11, 2012

Pumpkin Muffins with Cream Cheese FIlling

Ingredients

4 eggs

1 cup vegetable

2 cups sugar

2 cups pumpkin puree or 1 15 oz can pumpkin

2 ½ cups flour

2 teaspoons baking powder

1 teaspoon baking soda

1 teaspoon salt

2 teaspoon cinnamon

½ teaspoon ginger (I used pumpkin pie spice)

½ teaspoon ground cloves

½ teaspoon nutmeg

1 8 oz package cream cheese (I used low fat + 2 tablespoon sugar and splash of vanilla)

1 cup chopped pecans, optional (I used half cup and made half without nuts)
 

My mise en place

Directions

Roll cream cheese into a log in plastic wrap and put in freezer while assembling the batter.
Combine eggs, oil, sugar and pumpkin.  Beat well.
Combine dry ingredients (except pecans) to wet ingredients and mix well.
Use greased cupcake pan or paper liners.  Fill about ½ way.
Remove cream cheese from freezer and cut into equal portions (according to how many muffins you have*). Place cream cheese in center and press down under batter.  Sprinkle with chopped pecans.
Bake at 350° for 20-25 minutes.
~Source: Food dot com
Patti’s Notes: I mixed a couple of tablespoons of sugar and a little vanilla into the cream cheese before freezing.  It didn’t freeze very well so I ended up spooning it in instead of being able to cut it in slices.  I didn’t have ginger so I used pumpkin pie spice.  These turned out good.  Not has heavy as a typical muffin but not as fluffy as a cupcake.  The recipe says “makes 12”.  It made 24.  Even my husband who said "I don't like pumpkin, okay I'll try a bite" thought they were so good that he ate two before they had a chance to cool. 
Health ‘O Meter: Pumpkin is really good for you; the sugar, not so much.  Pumpkins are high in fiber, iron and beta-carotene.  These freeze well so exercise portion control by freezing some for another day.
Easy Meter: Super easy.


Top photo still hot, this photo after cooling

Wednesday, November 7, 2012

Pumpkin - Roasted and Pureed

Cut pumpkins in half (they are hard to cut, I solicited help from the hubster).
ETA: Tip of the Day: Round Two – Pumpkin Roasting - One week later: I was too inpatient to wait for Sleeping Beauty to get up so I discovered a small serrated knife works much better than the large butcher knife.  @not*so*hard*after*all*!

Scoop out the goop (technical term for seeds and stringy substance. Kitchen shears work great for cutting the stringy stuff).
Sprinkle with a little Kosher salt (brings out the flavor and the moisture) and roast at 400° for 30-40 minutes or until a knife pokes thru easily.
 
 
Cool for about an hour.
Scoop out the flesh.
 

Puree until smooth.
Clean seeds for roasting.  (Arrange single layer on cookie sheet, sprinkle with sea salt, roast for 15-20 minutes or until they dry out and get crunchy.  I turned off the oven and left them in the oven for another 10 minutes.  You can use any spices you like and make them sweet or savory.)
 
Use the puree to make pie (recipe to be posted in the next day or two).

 
You can use pumpkin puree in any recipe that you would use canned pumpkin. 
You can freeze the puree up to 6 months.  (I put it in zip top bags, about 2-3 cups in each.)
 
~Source: Alton Brown, Cooking Channel

Sunday, October 7, 2012

Dog Biscuits with Oatmeal and Peanut Butter

2 Cups Whole Wheat Flour
1 Cup Quick Oats (i.e. Quaker Oatmeal)
1/3 Cup Peanut Butter
1½ Cups Boiling Water
1 Egg
 
Preheat oven to 350°
 
Add boiling water to peanut butter and beat until combined.
Add flour and oats and mix until incorporated.
Remove from bowl and knead dough slightly.
Roll out dough to approximately ¼” thickness. 
Cut with cookie cutters.  Poke center of biscuit with a fork.  This will allow steam to release while baking.
Roll scraps into balls and cross hatch with a fork (like you would for peanut butter cookies).  My dogs are small so these little bites are perfect for them. 
Arrange on cookie sheet lined with parchment paper.  Beat egg and brush tops of cookies with egg wash.
Bake for 40 minutes.  Turn oven off and leave in oven overnight.  This will increase the “crunch factor” which is good for your dog’s teeth. 

This batch made 18 biscuits and 24 small bites.
 
Since there are no preservatives in the dough, store in the refrigerator for up to one month.  If the batch has made more than a month’s supply for your pet, put them in a zip bag and freeze part of the batch. 


Packaged for Bake Sale.

For Pumpkin Dog Biscuits:
1/2 cup whole wheat flour
2 eggs
1 1/4 cup pumpkin puree
1/4 cup peanut butter (smooth or crunchy)
1/2 tsp. ground cinnamon
Water (add water until you have a stiff dough, about ¼ cup)
Additional flour for rolling
Put all ingredients in a bowl and combine.  Roll out as above.  Bake  at 350°, 20 for small or 30 minutes for large biscuits. Turn oven off to cool and leave biscuits in oven overnight.


Josie & Romeo Approved

Lemon Cookies


I started with my Mom’s Basic Sugar Cookie Recipe.
It’s very old and has no details!  This is exactly how it’s written on a ripped piece of yellowed paper, in her handwriting (which I love).
Sugar Cookies
1 cup Marg
1 cup sugar
1 egg
2 cups flour
½ teas salt
½ teas baking soda
½ teas cream of tartar
1 teas vanilla
Dip bottom of glass in sugar ---
Makes 4 dozen
 
That’s it.  That’s all she wrote.  I think back in the day it was assumed that everything was baked at 350°.
 
My mise en place. I had to add the recipe and picture of my Mom laughing in the kitchen:


The day before I mixed 1 heaping tablespoon of lemon zest with 3 heaping tablespoons of sugar in a sealed container.  I planned on using that for the “dip bottom of glass in sugar”.  I figured the lemon zest would give it some extra zing. 
I added 6 teaspoons of lemon juice to the wet ingredients and 2 tablespoons of flour to compensate for the extra liquid.  I used butter instead of margarine.  Butter should be at room temperature for cookies.
 
Cream together butter, sugar, egg, vanilla and lemon juice.
In a separate bowl mix flour, salt, baking soda and cream of tartar.
Add dry ingredients to wet in two batches (that helps incorporate the flour into the creamed mixture).
Instead of rolling out the dough and using the rim of a glass or cookie cutters, I decided to shape the dough into a log and roll it in the sugar/lemon zest mixture.  I did this on plastic wrap (sorry couldn’t get a picture of the rolling because both of my hands were involved but I’m sure you get the idea).  I put the logs in the freezer for about 10 minutes until it was firm enough to slice.  I put the slices on cookie sheets (see photos below) sprayed with Pam and baked at 350° for 12 to 15 minutes*.  I had about 2 teaspoons of lemon juice left so I mixed it with 2 tablespoons of powdered sugar and made a glaze.  I brushed the glaze of the top of the cookies as soon as they came out of the oven.  I let them sit on the cookie sheets for about 5 minutes to firm up before transferring them to a cooling rack. 
 
Patti’s Notes, even though I’ve already included some along the way: I initially set the timer for 10 minutes and kept adding 2 minutes until they were done.  I started off with two cookie sheets in the oven and those took 15 minutes.  The remaining dough was only about 6 cookies and they only took 12 minutes.  Keep watching. 
Next time I will add a little more lemon juice to the dough.  They are lemony but not as tart as I would like.  I will also line the cookie sheets with parchment.  A couple of the cookies stuck to the “non-stick” baking sheets even though they were sprayed with Pam. 
The batch made 3 dozen cookies, not 4 dozen.  They are pretty good sized cookies, about 3” in diameter, so hers were probably smaller.  
 
Health-O-Meter: Well, they ARE cookies made with butter and sugar so don’t eat the whole batch! 
 
Easy Meter: Nothing difficult here.


Sunday, September 16, 2012

Potato and Poblano Gratin


Recipe as published:

Ingredients
Nonstick cooking spray
3 large poblano chiles, charred, stemmed, seeded, and cut into 2-inch wide by 1/2-inch-thick strips
1 cup frozen corn, thawed
1/2 cup half-and-half
1/2 cup Mexican crema, or creme fraiche
4 Yukon gold potatoes (about 1 pound), unpeeled and cut into 1/8-inch thick rounds
1 teaspoon salt
1/2 teaspoon freshly ground black pepper
3 cup coarsely grated Monterey Jack cheese

Directions
Preheat the oven to 400 degrees F.
Spray a glass 9 1/2-inch, deep dish pie dish with nonstick cooking spray. Set aside.
In a medium bowl, combine the poblano strips and corn.
In a small bowl, mix together the half-and-half and crema.
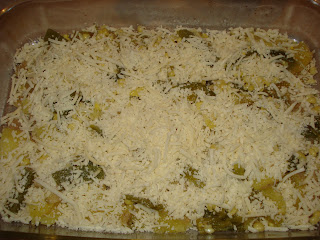
Arrange 1/2 of the potato rounds, overlapping slightly, in the prepared pie dish. Sprinkle 1/2 of the poblano-corn mixture on top, season with the salt and pepper, and top with 1/2 of the cheese. Repeat the layers, ending with the cheese. Pour the cream mixture over the potatoes. Place the pie dish on a baking sheet. Cover the dish tightly with foil. Bake for 30 minutes. Remove the foil and continue baking until the potatoes are tender and the cheese is golden brown, about 30 minutes longer.
Let stand 10 minutes before serving.
Cook's Note: For easy peeling, enclose the charred poblanos tightly in a plastic bag.
~Source: Food Network, Mexican Made Easy, Marcela Valladolid


Patti’s Notes: I was at Farmer’s Market in the morning and they had just roasted poblanos so I bought those instead of charring my own.  (DIY method is easy to do over a burner or under the broiler, and as Marcela said above, put them in a zip bag while still hot and the skin will peel right off.)  I used fresh corn instead of frozen because they had some at Farmer’s Market. I had about 2 pounds of Yukon Gold potatoes instead of one (again, Farmer’s Market) but didn’t double any of the other ingredients. I used a 9x11 baking pan instead of a deep dish pie dish. I read the comments about the recipe on Food Network's website so based on those I made the following alterations: My grocery store didn’t have Mexican Crema or Crème Fraiche so I subbed 1 cup heavy cream (as one commenter did). It worked fine and saved me the trouble of going to another store.  There were a few comments that the Monterey Jack was too bland so I used 2 cups of Pepper Jack and 1 cup of Mexican Cheese Blend.  There were also comments about the potatoes needing to cook longer so I par-boiled them first (as suggested).  Since everything was virtually cooked I baked them at 350° instead of 400° (still 30 minutes covered, 30 minutes uncovered). The potatoes are seriously delicious. 


Tip-of-the Day: Always read the comments posted on recipes.  Let someone else do the experimenting and use the ideas that make sense!   

Health-O-Meter: This recipe rates pretty low on the Health-O-Meter, however I have a tip to light up the dinner plate.  When serving a heavy side dish, make the rest of the meal healthy to balance it out.  I made a turkey on the rotisserie and steamed fresh green beans. 

Easy Meter: Food Network rates it “easy”.  I would agree. 

Monday, September 3, 2012

Easy Schmeasy Berry Cobbler


1 Pound Frozen Fruit
1 Yellow Cake Mix
12 oz Lemon/Lime Soda (7-Up, Sprite, etc.)
 
Pre-Heat oven to 375°
 
Put frozen berries in 9 x 11 pan;
Sprinkle dry cake mix over the top;
Pour soda over the mix;
Cover with foil and bake 30 minutes.  Remove foil and bake an additional 20 minutes.
Serve with ice cream or whipped topping.
 
~Source: this one is hard to pinpoint the origin.  It’s been all around the internet (Pinterest, Weight Watchers, Sparkpeople, etc.)
 
Patti’s Notes: I sprayed the pan with Pam and used a 16 oz package of mixed berries (blackberries, raspberries and blueberries) and added some extra berries that I had in the freezer (probably another cup or so).  I baked it an extra 10 minutes because I thought it was too loosy goosey.  I actually thought it was still too loose and that next time I should add some cornstarch over the berries to help thicken it, but low and behold, after it sat out for about an hour while we were eating dinner it set up and was just perfect. No cornstarch needed. We topped it with vanilla ice cream. The boys loved it.  I think everyone had seconds. There wasn't an ounce of leftovers. This one is a keeper. I think this would also be great made with frozen peaches.  Peach Cobbler ala mode.  Yum. 
 
Health-O-Meter: You can use regular cake mix and regular soda or you can lighten it up and use reduced calorie cake mix and diet soda. Top with Cool Whip Lite instead of ice cream.
 
Easy Meter: It doesn’t get any easier than this. 
  ^That's just frost on the berries, I didn't add sugar.
Covered with cake mix and bathed in 7-Up.