Monday, May 18, 2015

Meatballs in White Wine Sauce (Polpette della Nonna)


This is one of Chef Andrea's recipes as written by another blogger. 
Recipe says serves 4, YMMV


Ingredients 

For the meatballs:
1 pound ground meat (the ideal mixture is 70% beef and 30% unseasoned pork sausage, squeezed from their casings, or just plain ground pork if you can't find unseasoned sausages)
1 egg
1 cup grated Parmesan or Pecorino Romano Cheese
1/3 cup grated Fontina or Edam Cheese
1/2 loaf leftover or day-old bread such as baguette or ciabatta, torn into small pieces and soaked in milk (no crust, use only the soft part of the bread)
1 T salt
Pepper
1/2 cup fine dry unseasoned breadcrumbs (not panko)

For the sauce:
5 T extra virgin olive oil
1 clove garlic, lightly smashed, skin on
1 glass dry white wine, preferably Chardonnay
Fresh herbs of your choice, roughly chopped (sage, rosemary, marjoram, thyme, etc.)

Instructions
In a large bowl, use your hands to mix together the ground meat, grated cheeses, egg, the bread soaked in milk and salt and pepper. Mix it powerfully until it's completely smooth and all the ingredients are blended to uniformity. Set aside for about half an hour to let it rest.

Shape the meat mixture into meatballs, making sure to roll them in your hands firmly until they are compact balls slightly smaller than a golf ball with no cracks, gaps or lines. Roll them in the breadcrumbs just until they're lightly coated.

In the meantime, in a large shallow frying pan over low heat, heat the olive oil and cook the garlic until it starts to become golden.  Raise the heat to medium-high and begin adding the meatballs. Make sure not to crowd the pan too much, else they'll steam instead of brown. Fry until they're nicely browned outside but still a bit undercooked on the inside. Work in batches and add all the meatballs back into the pan before you proceed to the next step.

Now add the wine and fresh herbs and cook, covered, for 10-15 minutes until the majority of the wine has evaporated. During this time the meatballs will cook all the way through, but make sure to turn them once or twice so they get nicely coated with the sauce. Season with salt and pepper and serve hot.

~Source: Chef Andrea Consoli, Cooking Classes in Rome (with permission)
I took a cooking class in Rome, Italy with friends Jay and Bruce.  It was an amazing experience and one of the highlights of the trip.  Chef Andrea uses fresh and local ingredients.  We learned a lot of tips, like leaving the skin on the garlic, that’s where the nutrients are. This was not one of the recipes we made in class, therefore I don't have meatballs tips from Chef A. I referenced the garlic tip because "we Americans" have been taught to peel our garlic. I found this recipe on someone else's blog who took one of Chef Andrea's classes.  I was going to reference the blog but it appears the recipe has been removed. I asked Chef Andrea if I could post the recipe in my blog after I made it.  Permission granted. ;)  

Patti’s Notes: I used 1 pound Ground Beef and ½ pound Ground Pork.  For the cheeses: Parmesan and Fontina.  One small Baguette (crust removed) and fresh Rosemary from my yard.  I put the torn bread in a bowl and covered the bread with milk, maybe 1/4 to 1/3 cup.  After I mixed the meat and set aside to rest, I got the potatoes ready for roasting.  
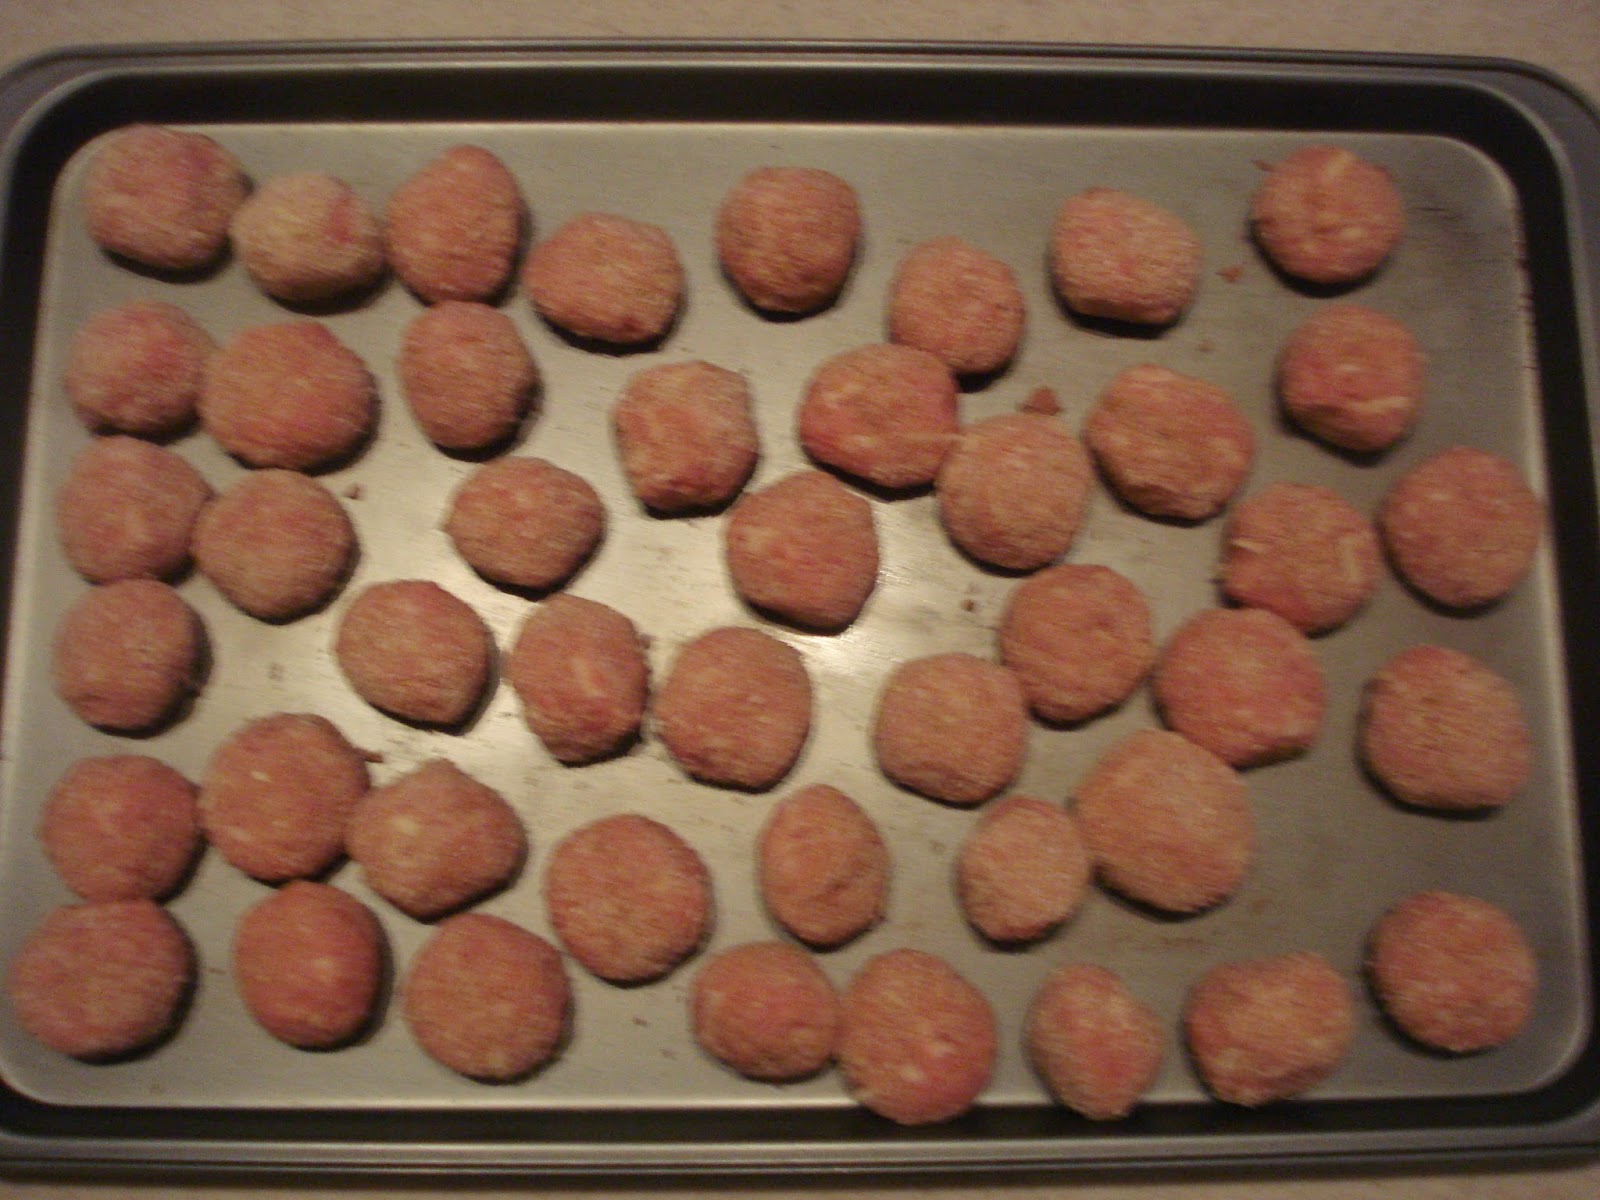
I used a ¾” diameter scoop for the meatballs then rolled them until firm with no cracks (as indicated in the instruction). When I started mixing the meat I thought I should have grated the cheeses finer, but they worked into the meat mixture just fine.


Two Oven Mitts Up.  The meatballs were seriously delicious.  
I served them with Chef Andrea's Rosemary Roasted Potatoes.  I think they would also go perfectly with mashed potatoes or over pasta.  

Rosemary Roasted Potatoes (Patate al Forno)


This is one of Chef Andrea's recipes as written by another blogger. 
Recipe says serves 4, YMMV

Ingredients 

6 medium yellow potatoes (not Russet, just a basic yellow thin-skinned potato)
2 cloves garlic, roughly smashed (leave a thin layer of the skin on)
2 stalks fresh rosemary
4 T extra virgin olive oil
Salt to taste

Instructions

Preheat your oven to 350°. Peel and slice the potatoes into slim wedges and put them in a bowl of water until you're ready to use them.

Remove the potatoes and dry them off a bit with paper towels. Run your hand down the rosemary stalk in the opposite direction that the leaves tilt in order to strip the leaves off.  In a large bowl toss the potato wedges with the olive oil, garlic cloves, rosemary leaves and a light sprinkling of salt.

Arrange the dressed potato wedges on a nonstick tray, making sure that they DO NOT OVERLAP. This is critical to ensuring you get some good crispy bits. Roast at 350° for about 45 minutes or until they are crispy and browned in spots and fork tender. This may take a little longer or a little shorter depending on the size of the potatoes; keep an eye on them.

Remove from oven and let cool for 2-3 minutes. This will make them easier to unstick from the pan.

~Source: Chef Andrea Consoli, Cooking Classes in Rome (with permission)
I took a cooking class in Rome, Italy with friends Jay and Bruce.  It was an amazing experience and one of the highlights of the trip.  Chef Andrea uses fresh and local ingredients.  We learned a lot of tips, like leaving the skin on the garlic, that’s where the nutrients are. This was not one of the recipes we made in class, therefore I don't have rosemary or potato tips from Chef A. I referenced the garlic tip because "we Americans" have been taught to peel our garlic. I found this recipe on someone else's blog who took one of Chef Andrea's classes.  I was going to reference the blog but it appears the recipe has been removed. I asked Chef Andrea if I could post the recipe in my blog after I made it.  Permission granted. ;)  
  
Patti’s Notes: I used white rose potatoes and did not peel them. I was kind of surprised when the recipe said to peel the potatoes.  Skin/Nutrients!  I lined the pan with foil to reduce sticking (and easy clean up). I mixed everything in the baking pan eliminating the extra bowl.  I'm all about the easy clean up


These potatoes were excellent.  Crispy on the outside and creamy (almost like mashed potatoes) on the inside.  I served them with Chef Andrea's Meatballs in White Wine Sauce however I think they would also go well with pork chops or grilled steak.  


Scaloppinedi Vitellone con Funghi (Beef Scaloppine with Mushrooms)


This recipes as written by Chef Andrea. 
Recipe says serves 4, YMMV

Ingredients 

500 gr / 1 lb beef top sirloin or tenderloin thinly sliced (at the market in Italy they are called "noce" o "rosa di vitellone")
1 clove garlic
5 tbsp extra virgin olive oil
130 gr / 1 cup all purpose flour
1 glass dry white wine (Chardonnay or Frascati are preferred)
250 gr / 1/2 lb / 8 oz Champinion mushrooms (back home you should call them Bottom or White mushrooms)
Salt
freshly chopped parsley

Instructions:

In a frying pan over low heat sauté extra virgin olive oil and garlic clove smashed (do not peel off the the skin as it contains all the anti-oxidant nutrients) until brown. Then add the mushrooms, cover with a lid and wait until all the water will be released for about 8-10 minutes (the time might be different depending on the variety of mushrooms you are using). Add dry white wine and let it cook until evaporated.
In another frying pan heat up extra virgin olive oil and in the meantime start flouring the meat slices, then brown it while sautéing for a few minutes each side. Add salt in the end, not while cooking otherwise you'll dry out the meat slices. The outside should be nicely browned, but it should still be tender and soft overall. Spoon the beef over the mushrooms, and let it season for a few minutes under low heat and add freshly chopped parsley in the end. In the meantime prepare a dish and adjust the meat and mushrooms over it, serve hot. It will be delicious!

~Source: Chef Andrea Consoli, Cooking Classes in Rome (with permission)
I took a cooking class in Rome, Italy with friends Jay and Bruce. This is one of the five recipes we made in class.  It was an amazing experience and one of the highlights of the trip.  Chef Andrea uses fresh and local ingredients.  We learned a lot of tips, like check the mushroom caps where they meet the stem.  It should be closed.  If it’s open the mushrooms aren’t as fresh.  Who knew?   
 
^Top mushrooms fresh, bottom mushroom getting old (from the same bin).  

Patti’s Notes:  I asked the butcher to slice the beef for scaloppine.  He did but it wasn’t as thin as the meat Chef Andrea had.  I used a mallet to pound it out a little thinner before cooking. 


The meat was super tender and delicious.  The mushrooms were amazing. 


Homemade Cavatelli Pasta with Fresh Tomato Sauce and Basil (Cavatelli Fatti a Mano con Sugo de Pomodora Fresco e Basilico)


This recipes as written by Chef Andrea. 
Recipe says serves 4, YMMV

Ingredients for the dough: 


500 gr / 4 cup of semolina flour (hard durum wheat)
250 ml / 1 cup lukewarm water
4 pinch salt

Ingredients for the sauce

5 tbsp Extra Virgin Olive Oil
1Kg / 2,2 lb fresh and organic San Marzano or Tomatoes on the vine (back home you are able to use Roma tomatoes too)
few leaves of fresh organic Basil
1 clove garlic
100gr / 1 cup Pecorino Romano or Parmesan cheese (to coat your dish)

Instructions for the fresh pasta:
Cavatelli  pasta (also known as Gnocchetti Sardi or Malloreddus) are made with a hard durum wheat (semolina) flour and water (no eggs) which gives them a distinctive golden yellow color (if you want to increase the yellow color just add a few pinches of saffron to it). It’s not a difficult recipe, but you may want to have some helpers if you have large numbers of gnocchetti to make!
To get ready with the dough, make a ring with the flour on a flat surface, marble or board and pour some of the water into the middle. Add salt and draw the flour towards the middle using your fingertips. Keep doing this until you have incorporated most of the water and flour into a sticky dough. Knead it lightly, adjusting water and flour until the dough is relatively smooth and elastic.
ETA - “Smooth like baby’s butt” as Chef Andrea says.
Wrap in cling film and chill for at least 15/20 mins.
Once chilled, divide the dough into quarters or more for ease of rolling. Roll these out using your fingers into long ropes of dough about 1cm/0,4 inch thick. Cut each rope into thin "pillows" and then press each pasta piece against the wood paddle or tines of a fork with your thumb, pulling down as you press and leaving a small dent inside. This should add the characteristic grooves to the pasta. Patience, practice and helpers will win out here!
Either cook straight away, or dust with semolina flour to prevent them sticking while you prepare the sauce. Once in a pan of salted boiling water, they will float to the surface when nearly done, needing no more than 4-5 mins to be "al dente".

Instructions for the sauce:
In a large frying pan over medium-high heat, sauté garlic with extra virgin olive oil (remember to leave the skin on and do not burn the oil, just wait for garlic to get brown). Then add chopped tomatoes previously blanched and peeled, and allow them to cook and sauté. After the tomatoes have cooked down for about 10 minutes, they'll look softer and release some water, add salt. You are able to add your own personal touch to the sauce with some chili flakes (but not too much) or fresh ricotta chunks in with the tomatoes. In the end add freshly chopped basil leaves.
ETA – One step from class, not included in the instructions: before adding the fresh basil, use an immersion blender to smooth out the sauce.  It will appear almost creamy although there is no cream.
To cook the pasta put a large pot of boiling water over high heat. When the water is boiling, toss in a couple of tablespoon of salt with the pasta. Stir to keep it from sticking and cook for 5/6 minutes until a piece of pasta tastes cooked (if the pasta if freshly made, just cook it for couple of minutes will be enough otherwise it will result too soft and mushy). Anyway once their ready they will float to the surface of your pot.
When the Cavatelli pasta is cooked, drain it and add it to the frying pan with tomatoes. Drizzle with cheese to coat the pasta. Season your dish with pepper if you like and garnish with some fresh basil leaves, and serve hot. It will be delicious!!!

~Source: Chef Andrea Consoli, Cooking Classes in Rome (with permission)
I took a cooking class in Rome, Italy with friends Jay and Bruce.  It was an amazing experience and one of the highlights of the trip.  Chef Andrea uses fresh and local ingredients.  We learned a lot of tips, like use a food scale to weigh your ingredients, rather than a measuring cup. This is especially important for flour since one cup of flour could vary in grams.  


Patti’s Notes: First, he’s right.  It *IS* delicious.
I used Roma tomatoes and Parmesan cheese.  I can only get San Marzano tomatoes canned, which would be fine but I prefer to use fresh whenever possible.
I used my pasta machine for making the dough.  I started off using the gnocchi cut but it was going super slow and I was worried the dough would become overworked and tough.  I don’t have a Cavatelli  board so I was trying to think of an alternative.  I remembered that Gramma Jo (very good Italian friends of the family when I was growing up) used to roll them off the back of a fork.  I tried that and it worked great.  Much faster than the machine. 
When I mentioned this, Jay reminded me that the recipe says you can use a fork.  I had to admit that since I was using my pasta machine, I only read the ingredients; I had not read the instructions!  :blush:

I cut a "X" at the top of the tomatoes and added them to boiling water for 10-15 seconds. You'll know they are ready when the skin begins to separate from the flesh.
 They are super easy to peel.  The skin will just slip off.
 Chop tomatoes prior to placing in the hot oil.

 This is how creamy it looks after using the immersion blender.
Cavatelli board used in class.
Drying Rack used in class.
 Mine (at home) rolled off the back of a fork. 

These recipes are very easy and made with simple ingredients.  A little time consuming however, as Alton Brown says “your patience will be rewarded”. 
Same ingredients but made with Tagliatelle instead of Cavatelli.