Sunday, August 12, 2012

Brie Bites

2 sheets puff pastry, thawed but still cold
1/2 wedge of brie, cold
1/3 cup cherry jam (or any flavor you fancy!)
1 large egg, beaten
splash of milk

Recipe as Written (but not exactly what I did)
Store bought puff pastry usually comes frozen and folded into thirds. We’re going to use these folded thirds to our advantage. Cut the puff pastry into thirds along the creases. Cut each panel into four pieces. They’ll be 2 1/4-inch tall and 3-inches wide. One sheet of puff pastry will yield 12 rectangles. Cut each rectangle in half. You’ll have 24 little rectangles that will create 12 little rectangle pockets.
Combine beaten egg and splash of milk. Brush 12 of the small rectangles with egg wash. If you’d like to make brie bites on sticks, now is the time! Place a popsicle stick halfway up the puff pastry and press in gently. Place a small sliver of brie (rind and all) on top of the egg wash (and stick). Top with about 1/2 teaspoon of cherry jam. Take another square of puff pastry and press between your fingers to make the rectangle slightly bigger. Place puff pastry on top of the cheese and jam. Use a fork to press the edges together. The egg wash will act as a glue. Make sure to seal the edges well by crimping with the fork.
Place a rack in the center of the oven and preheat oven to 375 degrees F. 
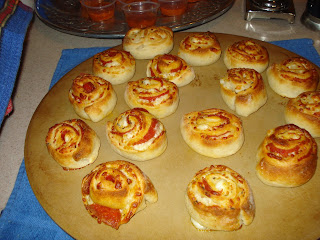
Place prepared brie bites on a parchment lined baking sheet. Brush with egg wash. Sprinkle with a touch of coarsely ground sea salt. Bake for 12 to 14 minutes or until golden brown.
Remove from the oven and allow to cool slightly before serving.
Brie bites are best served warm, but are also delicious at room temperature.

~Source – Pinterest via Joy the Baker

Patti’s Notes: Okay, I used this more like a pattern than a recipe.  I didn’t add milk to the beaten egg, I don’t think it’s necessary.  I didn’t use the popsicle sticks.  I used French Strawberry Jam because Frenchy Momma had just brought a jar from France for my sister.  Next time I’ll try Fig Jam.  I think fig goes great with Brie.  I did not egg wash the inside of the puff pastry.  I only used the egg wash on top to make the pastry brown and shiny. I didn't add the salt ground sea salt (I forgot but it really didn't need it so that was okay). 
The author says let cool, best served warm or room temp.  I disagree.  I like them hot (being careful not to burn your mouth because you can’t wait to try them straight out of the oven).  Room temperature was okay but not as good as when they were still hot/warm.  That being said, next time I will use my pizza stone so they will stay hot while being served. 

Tip of the Day:  Keep one sheet of puff pastry in the refrigerator while you are preparing the other.  You want it to stay cold because if the butter starts to melt it won’t “puff” as well.  I assembled one sheet, put it in the oven and started the second sheet. 
.
Heath-O-Meter: These do not rate very high in the Healthy Appetizer Department.

Easy Meter: It’s time consuming but not difficult.  As you can see it's also a bit messy!  


Sunday, July 22, 2012

Cheese and Tomato Tart


7 fresh or frozen filo pastry sheets, thawed
1/4 cup melted butter
2 tablespoons Dijon mustard
2 cups grated Swiss cheese (recommended  Emmenthal)
8 large ripe tomatoes, sliced 1/4-inch thick
Coarse salt
Freshly ground black pepper
1 tablespoon fresh thyme leaves
12 fresh basil leaves, for garnish

Preheat oven to 400 degrees F.

On a large baking sheet, place 1 sheet filo pastry and brush with melted butter, repeat, stacking them on top of each other as you build your pie crust. You may want to stagger the sheets a little bit to ensure that the baking sheet is well covered allowing a little bit of an edge.
On the top layer, brush on the mustard. Sprinkle the cheese evenly over the pastry to ensure even coverage. Lay the tomato slices generously, all over, overlapping, as needed. Season with coarse salt and ground black pepper. Sprinkle the thyme leaves on top.
Bake in the oven until the pastry is crisped and browned at the edges, about 25 minutes.
Add another sprinkling of coarse salt, and cut the tart into 8 squares. Garnish with fresh basil leaves. Delicious when served hot, warm, or at room temperature*.

~Source: Chuck Hughes, Cooking Channel

Patti’s Notes:
I also used farm fresh tomatoes and put the slices on paper towels (sprinkled with a little salt) to draw out some moisture prior to assembling. I lined the baking sheet with parchment paper.  I used Stone Ground Dijon.  I’m a cheese lover but Swiss is not my favorite so I used half Swiss and half Shredded Four Cheese Blend.  I skipped the second round of salt since I had salted the tomatoes from the get go.
*These were best right out of the oven, not as good at room temp.  Next time I will serve them on my pizza stone to keep them warm for a longer period of time.

Easy Meter:
Filo Dough is not my favorite thing to work with.  It is very fragile and ALWAYS breaks apart.  Since the sheets are layered in this recipe it doesn’t really matter if they look like a patchwork quilt.  You won’t see the seams. 

Health-o-Meter: According to the nutritional value on the box, 5 sheets of filo has 1 gram of fat and 2 grams of sugar. There are 7 sheets in the recipe and Chuck says it “serves 8” so you can do the math.  It’s on the low end for a carb product.  The calories are in the cheesy deliciousness. 


Tomatoes on papertowels 'drying out' a little (30 minutes) prior to assembly.

7 sheets of buttered filo


A schmear of stone ground Dijon mustard
Say cheese!
All that lovin' ready for the oven.

M-M-Good!

Monday, July 16, 2012

Grilled Eggplant with Tomatoes, Basil & Cheese


Slice eggplant; rub with EVOO, Salt & Pepper. Grill 4 minutes each side; add sliced tomatoes, mozzarella, provolone cheese and fresh basil. Grill another 2 minutes or until cheese is melted.

I don’t do hash marks but if I did I’d say #MeatlessMonday,  #Vegetarian, #LowCarb, #SuperDelicious, #EasySchmeasy

Monday, July 9, 2012

Grilled Chicken with Garlic/Basil/Lemon Sauce


4 Boneless Skinless Chicken Breast

Marinade:
1/3 C Extra Virgin Olive Oil
3 T Lemon Juice
½ t Salt
½ t Pepper

Sauce:
1 Clove Garlic
1 C Fresh Basil Leaves
¼ C Lemon Juice
1 t Lemon Zest
½ t Salt
½ t Pepper
1/3 C Extra Virgin Olive Oil

Mix marinade and add chicken to zip top bag.  Marinade at least 30 minutes (at room temperature) or up to several hours (in the refrigerator).

Grill chicken.  I use the ‘Emeril Lagasse’ method.  On hot grill cook chicken 4 minutes.  Turn ¼ turn (not over) and cook another 4 minutes.  Turn chicken over and cook 4 minutes.  ¼ turn and cook another 4 minutes. 

In blender puree all sauce ingredients except EVOO until smooth.  Add EVOO slowly to mixture.

Put chicken on platter and pour sauce over the top.

Patti’s Notes: I buy Boneless Skinless Chicken Breast at Costco.  They are pretty big so sometimes they take an extra 2 minutes to grill.  If you use smaller (normal size) chicken adjust cooking time accordingly.
Pictured above with corn and roasted baby beets. This sauce was really good and I think it would be great over pasta (next time).

Health-o-Meter: I’d rate this as petty healthy.  Olive oil is a “good for you fat”. 

Easy Meter: It doesn’t get much easier than this. 

Source: I think I saw something similar on a Food Network Moment (?Giada?) and just used the idea and faked it with the amounts. ;-)

Wednesday, March 28, 2012

Asian Apricot Chicken Wings

Ingredients:
1 Package Chicken Wings (approximately 2 pounds)
Peanut Oil
Seasoned Rice Wine Vinegar
Soy Sauce
Fish Sauce
Ground Ginger
Red Pepper Flakes
No Sugar Added Apricot Jam
Kosher Salt and Cracked Pepper


How To:
Preheat oven to 450°.
Line baking pan with foil and insert rack.
Prep wings. Cut off wing tips or as Alton Brown calls them, the culinary wasteland. Snip the skin between the wing and drumstick portion then snap it backwards for its natural breaking point. You can now easily cut thru making two pieces. Lay chicken pieces flat on the baking rack. Sprinkle with salt and pepper. Bake for 15 minutes.
In the meantime make the sauce. I didn't measure so this is approximate: Equal parts oil and vinegar to equal ¼ cup; about a tablespoon of soy sauce; about a teaspoon of fish sauce, a good sprinkle of ginger (about a ½ teaspoon) and a shake or two of red pepper flakes. Mix with a wire whisk. Add 2 heaping tablespoons of jam. Mix to combine.
After wings have been in the oven 15 minutes, brush sauce over wings, turn them over and brush the other side. Return to oven and bake 15 minutes. Put under broiler for about 5 minutes or until golden brown.


~Source: This was inspired by a Kraft recipe that called for Asian Ginger Salad Dressing and Orange Marmalade. I had neither so I made my own version of an Asian Dress and used SF Apricot Jam instead. (The original recipe called for ¼ cup dressing; ¼ cup jam and double baking. I added the salt & pepper, turning the wings over to get the sauce on both sides and the broiler part cuz I like ‘em tasty and crispy!)


Patti’s Notes: The foil lined pan will make clean up a snap and the rack will allow the heat circulate for even cooking. Don’t throw away the wing tips. Put them in a zip bag and freeze them for another day (chicken stock). Hey, you paid for them, might as well get your money’s worth and not have to buy stock/broth. Don’t be afraid of Fish Sauce (found in the Asian section of the grocery store). It does not taste fishy; it just tastes like a different layer of salty.
Health-o-Meter: I’d say middle of the road because of the chicken skin.


Easy Meter: Also middle of the road because of prepping the chicken. You may be able to find wings already separated. In that case I’d say easy schmeasy but DIY is less expensive.


Wednesday, February 8, 2012

Pizza Pinwheels


1 can Pillsbury Refrigerated Pizza Crust
½ tsp Garlic Salt
1 tsp Dried Basil
¼ Cup Shredded Parmesan Cheese

1 Cup Shredded Mozzarella Cheese
½ Cup Sliced Pepperoni, Chopped
1 Cup Marinara or Pizza Sauce

Preheat oven to 425°

Roll out dough from pop can and stretch into rectangle. Sprinkle with garlic salt, basil, cheeses and pepperoni. Starting at the short end, roll dough into a log. Slice into 1” pieces. Place on lightly greased baking sheet. Bake for 10 minutes or until browned on top. Serve with warm marinara sauce for dipping.

~Source: quickdish via pinterest


Patti’s Notes: Okay, I confess, I didn’t measure anything and I didn’t chop the pepperoni. I do however, put the pepperoni on a paper towel and put it in the microwave for about 10 seconds to drain out some of the fat. I also used the Thin Crust version of the pizza crust and I used my pizza stone. I left them on the pizza stone for serving so they would stay hot. I had some two ounce plastic cups so after I heated the marinara sauce I put a little scoop of sauce in the cups. That way people could put the sauce cup on their plate and use it for dipping instead of the sauce running all over the plate.

Tip of the Day: After rolling everything into a log, wrap it in plastic wrap and place it in the freezer for about 10 minutes. It will make it easier to cut. Also, use a serrated knife. If not everything will squish together and you’ll end up with pizza blobs instead of pizza pinwheels. It would still be tasty but not very pretty! ;-)

Easy Meter: Yes.

Health-o-Meter: Let’s be honest, pizza isn’t the healthiest thing in the world but it’s not the worse either. You could make a veggie version or substitute other toppings but don’t put the sauce in the mix. From what I’ve heard it makes a big gooey mess. Use it on the side for dipping
.

Taco Cups

1 lb ground beef
1 packet taco seasoning
2/3 cup water
1 can black beans, drained
2 cups cheddar cheese, shredded
36 wonton wrappers
Toppings: salsa, cheese, sour cream, lettuce, tomatoes, etc.
cooking spray

Preheat oven to 375°

Brown the meat in a skillet and drain off fat. Add the taco seasoning, water and black beans. Mix and simmer for 5-10 minutes, until water is absorbed.

Spray 18 regular muffin pan cups with cooking spray. Place one wonton wrapper in each muffin cup. Divide half of the taco meat between muffin cups. Sprinkle half of the cheese over the cups. Repeat layers: wonton, taco meat and cheese.
Bake at 375 for 20 minutes, or until cheese is bubbly. Top with your favorite taco toppings.

~source: plainchicken via pinterest


Patti’s Notes: You don’t need to use muffin liners; they easily lift right out of muffin pan when
done. When putting the cooked meat/bean mixture into the wonton wrappers I used a melon baller (small ice cream scoop). I pressed down a little on the second wonton wrapper so they would ‘fuse’ together.

Easy Meter: Simple Simon. They don’t take long to assemble and I didn’t miss frying tortillas at all.

Health-o-Meter: Wonton wrappers are WAY lower in calories than tortillas, then they are baked not fried so in my book they rate healthier than regular tacos. The calorie count would vary depending on what toppings you use, i.e.: regular sour cream, light sour cream, plain Greek yogurt, guacamole or no toppings at all.